If you are going to print your document/s at Family Mart or Lawson, you may wish to download the “PrintSmash” app first, through the following links:
Apple Store - https://apps.apple.com/jp/app/printsmash/id551942662
(You may also download the PDF file of the instructions here.)
After downloading the app, you may follow the steps below:
1. Select your preferred Language by tapping the “Language Selection” button at the upper right corner of the screen.

2. For this tutorial, the “English” Language will be selected.
(You may also choose “Tagalog” as preference”).

3. Next, select the “Print/Scan via Smartphone” option.

4. Select “Print PDF” option.

5. Wait for the printer to process your request.

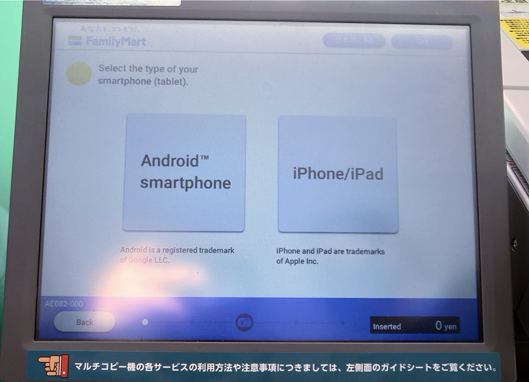
6. A screen will pop up inquiring if you have or not yet installed the “Printsmash” App in your smartphone.

If you select yes (install Printsmash), you will be instructed to select the type of smartphone (Android smartphone or iPhone/iPad) where you will install the app.

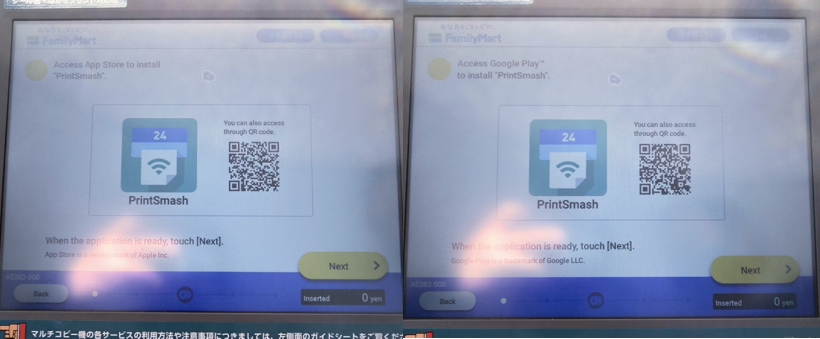
7.You will then receive a QR code to access the Google Playstore or Apple Store to download the “PrintSmash” app. Click “Next”.

8. If you have successfully downloaded the “PrintSmash” app, you will then be instructed to open the app in your phone, and connect your smartphone to the Wi-Fi connection shown in the screen and input the provided password.

9. The app will show a prompt once you have successfully connected to the Wi-Fi connection:

10. Select the file you wish to print by clicking “Print PDF”

11. Once you have selected the file you want to print, press the send button in the app.

12. The file you have sent will now be shown in the screen and then click “Finish and Next”.

13. Select “Plain paper/Glossy paper”.

14. Read the information and select “Agree”.

15. Select the file you wish to print and then click “Next”.

16. Select “B/W”.

17. Select “A4” and press “Next”.

18. Pay the required amount.

An A4 page normally costs ¥10 per sheet.
19. You will then receive a pop up warning on the display configuration of the file that will be printed. Click “OK” to proceed.

20. Set Fit to Page to “Yes” and 2 in 1 Sheet to “No”, and click “Next” to proceed.

21. Select the no. of prints (or copies) and the option to print receipt. Press “Start” to proceed.

22. Select “Yes” to start printing.

23. Wait for the printer to print your document. You may select “Yes” or “No” in printing your receipt.

24. You will be prompted once the printing has been completed. Press “OK” and get your document and (if selected as an option) your receipt.


